You have no items in your shopping cart.
Fiberglass projects often push creative boundaries, combining technical know-how with hands-on expertise. One of our talented customers, Alonzo, recently set out to build a mini keel for his catamaran using a mold. His ambitious two-part project took him through an impressive series of steps, from crafting the mold to fully attaching the keel to the catamaran.
For boat builders, DIY enthusiasts, and fiberglass hobbyists, this project is packed with lessons, and a closer look at how fiberglass can transform large-scale ideas into reality. Here's an overview of Alonzo's process, as shared in his incredibly detailed YouTube videos.
Part 1: Building the Mold for the Mini Keel
The process of building the mini keel mold is no small undertaking. Alonzo’s meticulous approach shines through in each step he shares. Here’s how Part 1 unfolded.
Step 1: Removing the Keel for the Mold Creation
Alonzo began by carefully removing the keel he intended to replicate. This was the foundation for his project, as the removed keel would serve as the initial pattern for his mold.
Step 2: Prepping the Keel for Mold Creation
Next, the surface preparation work began. Alonzo sanded off old bottom paint and used fairing putty to fill any imperfections in the surface. Achieving a flawless mold requires ensuring the keels' surface is smooth and impeccable.
Step 3: Applying Gelcoat and Surface Preparation for Molding
Alonzo applied layers of gelcoat with a roller. After the gelcoat application, he proceeded to sand and wax the surface for optimal mold release performance.
Step 4: Creating a Parting Board with Plywood
For added precision, Alonzo cut a plywood parting board to size and attached it securely to the prepared keel. This board served as a guide for splitting the mold. He then used modeling clay to fill any gaps between the keel and the parting board, ensuring a clean mold edge.
Step 5: Mold Release & Fiberglassing
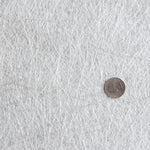
To avoid any sticking during mold removal, Alonzo applied Orca Shimmer Wax and PVA as a mold release agent. With the mold release complete, he added two layers of 1708 knitted fiberglass cloth and vinyl ester resin to the keel, creating the core mold structure.
Step 6: Mold Removal and Reinforcement
Once the fiberglass cured, Alonzo separated the mold from the keel and reinforced the back of the mold to ensure it maintained structural integrity. And with that, the mold was complete.
Part 2: Creating and Attaching the Mini Keel
With the mold finished, Alonzo transitioned to the next phase of his project.
Step 1: Prepping the Mold
Before beginning the fabrication, Alonzo applied mold release agents again, using Orca Shimmer Wax and PVA to ensure an easy separation later.
Step 2: Fiberglass Layering
Alonzo added five layers of 1708 knit biaxial fiberglass into each half of the mold, layering it with vinyl ester resin for strength and durability. Excess fiberglass on the edges was carefully removed, and acetone was used to clean up the mold’s edges.
Step 3: Joining the Mold Halves
Using structural vinyl ester putty, Alonzo joined the two mold halves together, creating the foundational keel shape. He cleaned off any remaining PVA and resealed the joined edges. After sanding and cleaning, the edges were reinforced with fiberglass for additional stability.
Step 4: Injecting Boat Pour Foam
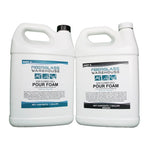
To ensure the desired buoyancy and strength, Alonzo drilled holes in the keel and filled them with boat pour foam. Excess foam was trimmed back, and fiberglass was applied over the foam to reinforce the structure.
Step 5: Final Finishing Touches
After sealing the foam-filled holes, Alonzo added additional fiberglass layers and applied a protective barrier coat to the keel. The finishing process ensured the mini keel was ready to withstand the demands of catamaran sailing.
Step 6: Attaching the Keel to the Catamaran
Finally, Alonzo attached the keel to his catamaran, completing the extensive project. The end result was a durable, expertly crafted mini keel that combined functionality with precision engineering.
Lessons Learned from the Process
Throughout the project, Alonzo shared valuable lessons that any boat builder or DIY enthusiast could benefit from, including:
- Patience is Key: There were a couple sections of the mold that stuck a little bit because not enough time was allowed between layers of Orca Shimmer wax. Building a mold and fabricating parts takes time. Rushing the process can lead to errors. It is important to take your time and follow the manufacturer's guidelines.
- Proper Preparation Matters: Not enough lip/ edge was left to easily remove the part from the mold. A wider lip on the mold would have made the removal process simpler. Alonzo was able to remedy this by adding more gel coat.
- Cover all your Bases: When pour foam was being added inside a cavity, the top of the keel split. This occurred where the part was not reinforced with fiberglass. Alonzo repaired this by cutting the section where the top split, trimmed back the foam and then used putty and fiberglass to reinforce the area. He was then able to add more foam.
These problems were very minimal and Alonzo was able to remedy them with ease.
Build Your Own Boat Project with Confidence
Alonzo’s catamaran keel project is an incredible example of how fiberglass can expand what's possible for DIY boat builders. From creating a detailed mold to final reinforcement and attachment, every step of the process was completed with care and expertise.
Whether you’re a seasoned boat builder or just starting your first project, take inspiration from Alonzo’s dedication and resourcefulness. With the right materials, patience, and commitment, your boat-building dreams can become a reality too.
Stay tuned to Fiberglass Warehouse for more inspiring customer projects, and stock up on all the fiberglass supplies you need for your next big idea. www.fiberglasswarehouse.com


