You have no items in your shopping cart.
Fiberglass is one of the most versatile materials for DIY projects, whether you're repairing a boat hull, creating a custom part, or tackling home improvements. But to get professional-quality results, preparation is crucial. Fiberglass work can quickly derail without proper planning, leaving you with wasted materials, a mess to clean, and subpar finishes.
This blog will guide you step by step through the essentials of preparing for your fiberglass project. From getting your workspace ready to gathering the right tools and materials, we’ll ensure you're set up for success.
The importance of preparation in fiberglass projects
Before we jump into the nitty-gritty, it’s essential to understand why preparation is vital. Fiberglass work involves chemical reactions between resin and hardener, meaning time and precision are key for success. Proper prep ensures smooth application, a strong bond between layers, and a superior final result.
The smoother—both literally and figuratively—your preparation, the easier the execution will be! With all your tools and materials laid out in advance, you can work efficiently and enjoy the process.
Now, here are the essential steps to prepare for your fiberglass DIY adventure.
Step 1. Prep your workspace for fiberglass success
A well-organized workspace can make or break your project. Here's how to get it right:
Choose the right environment
- Ventilation matters: Fiberglass resin and chemicals release fumes that can be hazardous if inhaled in enclosed spaces. Work in a well-ventilated area, such as a garage with open doors or an outdoor setup under a canopy.
- Temperature counts: Aim for an environment with temperatures between 70°F and 80°F (15°C-26°C) for optimal curing. Extreme cold can slow resin curing, while high heat can speed it up unpredictably.
Gather safety equipment
Fiberglass involves sharp materials, sticky resins, and potentially harmful particles. Protect yourself with these basics:
- Nitrile or chemical-resistant gloves
- A high-quality respirator or a mask with VOC filters to guard against fumes
- Eye protection like safety goggles
- Long sleeves or coveralls to prevent skin irritation from fiberglass particles
Organize your space
- Work surface: Lay down plastic sheeting or a cardboard layer to protect your work surface from resin drips or scratches.
- Accessibility: Position all tools, materials, and safety gear within arm’s reach to avoid scrambling mid-project.
Step 2. Gathering your materials and supplies
Before you start mixing resin or cutting fiberglass cloth, make sure you have a full inventory of materials. Here’s what you’ll need:
Core materials
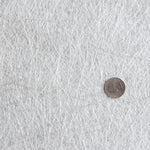
- Fiberglass cloth, knit biaxial or mat: Choose the proper type and weight for your project. Heavier mats work for structural repairs, while cloth is ideal for smoother finishes.
- Core material: If your project requires reinforcement (like sandwich panels), use cores like foam or balsa wood.
Resins
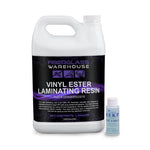
- Resin & hardener: Epoxy and vinyl ester resin is favored for its strong, waterproof properties. Polyester resin is budget-friendly but less resistant to water. Match your project needs!
- Acetone for cleaning tools and mistakes.
Tools for application
- Mixing cups with pre-measured increments
- Stirring sticks or tongue depressors
- Brushes or fiberglass rollers for even application
- Laminating tools like squeegees or stiff plastic cards ensure a smooth finish
Step 3. Pre-cutting fiberglass cloth and core materials
Attempting to cut fiberglass during the application phase can be stressful and messy. Precision is easier before resins come into play.
Measuring accurately
- Use a ruler or measuring tape to mark your fiberglass fabric. Make sure dimensions align with the surface area you’ll be covering. Depending on your project, you may need some overhang.
- Avoid cutting too close to the final dimensions—fiberglass tends to fray, so leave a little extra around the edges.
Use sharp tools
A dull blade will shred fibers instead of cutting them cleanly. Use fiberglass scissors, a utility knife, or a rotary cutter for precise edges.
Pre-fit your materials
Lay the cut fiberglass mat over your project area to ensure that it fits properly. Make adjustments as needed before introducing any resin.
Step 4. Setting up your resin station
Mixing resin correctly is critical for durability. Follow these steps to set up your station so you can work quickly and efficiently:
Mix small batches
Fiberglass resin has a limited "pot life" (working time before hardening begins). It’s better to mix small amounts and make fresh batches to extend your window.
Keep your tools clean
- Resin hardens quickly, so wipe down brushes, squeegees, and rollers with acetone immediately after use.
- Discard stirring sticks or disposable tools when a batch hardens.
Plan for success
Preparation is your secret weapon in any fiberglass project. A little extra effort up front can create professional-grade results that are built to last.
If you're gearing up for a fiberglass venture, remember these key steps:
- Create a well-ventilated, organized, and safe environment.
- Gather all your tools and materials—don’t underestimate the importance of proper resin and cloth selection.
- Pre-fit pieces and pre-mark ratios for a stress-free application.
Whether you're patching up your boat or creating something entirely new, careful preparation will turn your vision into reality. Have additional questions? Drop us a comment below or contact us at sales@fiberglasswarehouse.com


