You have no items in your shopping cart.
If you've ever worked with fiberglass, you know that it is more of an art than a science. There are a few things you need to know in order to get the best results for repairs, and one of those is how to use fairing putty. Fairing putty is a compound made specifically for filling in gaps and smoothing out fiberglass surfaces. It can be purchased pre-made or it can be made with a resin and fiberglass fillers. In this guide, we'll walk you through the basics of how to make a fairing putty as well as using it to fair your fiberglass surface.
What is Fairing Putty and What Does it Do?
Fairing putty is a compound made specifically for filling in gaps and smoothing out surfaces such as boats, cars and other objects that are made with fiberglass. This is important because it ensures that the object has a consistent appearance and that there are no gaps, imperfections or bumps in the surface.
Over time, your fiberglass surface may end up with some damage such as holes, cracks, gouges or dents. Or, a new surface may have some gel coat blemishes or be uneven. Fairing putty can be used to repair these areas and make the surface smooth again.
What is Needed to Make a Fairing Putty
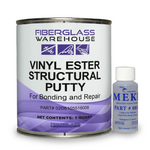
As mentioned earlier, you can purchase a pre-made fairing putty. This will save you time and limit the amount of guesswork needed for your project. You can also make your own which can be a more affordable option. Making your own fairing putty gives you more flexibility depending on your project. You can choose whether you need polyester, vinyl ester or epoxy resin. You can also choose which filler you need.
There are many things to take into consideration when choosing a type of resin including, what the original part was made of, if it will be used below the waterline and what will be used over the top of the fairing putty-
Polyester Resin- Comes in a variety of grades including, DCPD, ortho laminating or ISO resin. Polyester resin is a good choice if the original part was made of polyester. It is also the ideal choice if you want to use a gel coat over the top. Gel coat is a polyester-based resin and will not adhere to an epoxy resin.
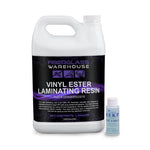
Vinyl Ester Resin- Another great choice to use when fairing. It can be used both above and below the water line. It is a little more expensive than a polyester resin but has less shrinkage. A gel coat can be used over top and adhere well.
Epoxy Resin- Epoxy has the best strength and adhesion. It is the most ideal resin out of the three to use on surfaces that will be under the waterline. It is the most expensive resin but has a lot of benefits. It can be used over the top of fiberglass parts originally made with epoxy, vinyl ester or polyester resins. Epoxy resin has the least amount of shrinkage out of all three resins.
Each resin will need a hardener. For polyester and vinyl ester resin, you would use MEKP (methyl ethyl ketone peroxide). Epoxy resins have three different hardener choices. They come in fast, medium and slow. The desired speed for epoxy resin hardener will depend on the temperature you are working in and what the needed work time will be.
Next up is choosing a fiberglass filler. This will be used in the resin to create a putty. One filler can be added or several depending on what outcome is desired. These outcomes could include reducing or increasing weight, improving sanding properties, preventing sag, filling gaps, improving bonding properties etc. There are quite a few to choose from and each one has their strong suit.
Fumed Silica- (also known as Cabosil or Aerosil) can be used with polyester resin, epoxy resin and urethanes as a thickening agent. It helps prevent sag or run off on vertical surfaces. Additional fillers can be added with fumed silica such as glass bubbles and/or milled fibers to achieve additional structural properties. A downside to fumed silica is that it is hard to sand.
Phenolic microspheres- purple/brown microscopic spheres that are easy to sand and great for light weight compounds. Good for filling large holes. They do not crush like glass bubbles, but will flatten out. Can be used with other fillers for additional properties such as fumed silica that prevents sagging.
Glass Bubbles- lightweight hollow glass microspheres. They make the putty easier to sand. Great for minor surface repairs such as cracks and holes.
Milled fibers- comes in different lengths such as 1/32” and ¼”. They are glass filaments that are coated with a specific sizing to enhance resin compatibility. Not chopped to a precise strand length. Adds strength and dimensional stability. It also increases impact resistance and surface hardness.
Wood flour- light brown, flour-like, wood by-product most commonly used to thicken epoxy resin to peanut butter consistency for radiusing inside corners. It makes a coarse structural putty that is easy to sand.
How to use fairing putty
Now that you know what fairing putty is, how to make it and what it does, let's take a look at how to use it. The process is actually fairly simple, but there are a few things you need to keep in mind.
***Make sure to wear appropriate safety equipment and clothing including a respirator and gloves. Some of the fillers are very light weight and are easy to breathe in.
1. The first step is to clean the fiberglass surface that you want to fair. You can do this with a solvent such as acetone. Make sure all dirt and dust are removed, and then give the surface a light sanding using sandpaper. This will help the fairing putty adhere to the surface better.
If you have cracks or other imperfections to grind out, do this before step one. You could use a Dremel or grinder. Make sure you clean off any sanding residue.
2. Next, if you bought premade fairing putty, mix the fairing putty according to the instructions on the package. You want to make sure that it's mixed well so that there are no lumps in it. Typically all you have to add to a pre-made fairing putty is the hardener.
If you are making your own fairing putty, mix the resin with the hardener. Work in smaller batches. Make sure to use the proper ratio of resin to hardener. If you do not, the putty won’t cure properly and will not be as strong. It is also important to mix the resin and hardener thoroughly. Once the hardener is added and mixed thoroughly the time clock begins. You want to make sure you get everything done before the resin starts to gel.
If you are using a polyester or vinyl ester laminating resin, you will need to add some wax before adding the MEKP and filler to the final layer. The wax will rise to the top of the repair so that it cures tack free. You could also choose to use a polyester finishing resin for the final layer to avoid having to add the wax separately. If you know you will be doing several layers, do not add the wax until the last one. If you add wax or use finishing resin for any other layer but the last, you will have to sand between layers.
3. Once the resin and hardener are mixed well (and the wax if needed) the filler can be added. Add the filler slowly so the putty will be even and easier to work with. Mix to the desired consistency. For many projects, the ideal consistency is “peanut butter consistency”. This allows for no sagging on vertical surfaces. You may need quite a bit of filler to obtain the peanut butter consistency.
4. Apply the fairing putty to the surface using a spreader or brush. Make sure it's applied evenly, and don't forget to fill in any cracks or holes. You will want to fill the imperfections as close to level with the outer layer as possible. You can add it slightly more than the surrounding surface and sand it down once cured. You may have to do several layers before everything blends at the same height.
5. Finally, when the area looks even, let the fairing putty cure completely before sanding it down smooth. If there are any areas that need more coverage, apply another thin layer of putty and repeat the process. Wait to sand until it is fully dry to avoid a mess.
6. Depending on what resin you used, you can add a gel coat, paint or top coat over top.
Conclusion
In this guide, we walked you through the basics of fairing putty, how to make it and how to fair your fiberglass surface. This is a great way to repair any damage that may have been done to your boat, car or other object made with fiberglass. It's also a good way to smooth out any uneven surfaces on your project. If done correctly, it will greatly improve the appearance and strength of your fiberglass surface.
We hope this guide was helpful and that it gave you the information you need to start fairing your own fiberglass projects today!
If you still have question about fairing, don't hesitate to ask us for help- sales@fiberglasswarehouse.com.
To help you pick out the best resin, you can see our blog posts here-



very well explained info !