You have no items in your shopping cart.
When the calm of the water or the open road is interrupted by an unexpected tear or hole in your fiberglass vessel or vehicle, it’s not the end of the world – it's the start of a hands-on repair that can restore your prized possession to its former glory. Whether you're a seasoned DIYer or just eager to learn, mastering the art of fiberglass repair is invaluable. This comprehensive guide is tailored to help you tackle the task of fixing a hole or damage in fiberglass parts, ensuring a durable, smooth finish that’s both structurally sound and aesthetically pleasing.
Below, you'll not only find step-by-step instructions but also tips and insights to make this process as painless as possible and guarantee that your fiberglass part is as good as new (or even better). For the purpose of this guide, we assume the damage is something that standard fillers and polishes can't repair. It's time to roll up your sleeves, gather your materials, and learn how to repair like an expert.
Understanding the Fiberglass Fabric and Resin
To get started, it is crucial to familiarize yourself with the two main components of any fiberglass repair: the fabric and the resin.
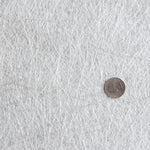
Fiberglass fabric, often referred to as 'glass' or 'mat,' is the reinforcing material that gives the composite its strength and flexibility. It comes in various forms, including woven roving, cloth, knit fabric and chopped strand mat (CSM). When applied to a damaged area, the fiberglass is a structural reinforcement that with resin, bonds with the surrounding material to create a unified structure.
Resin is the binding agent that secures the fiberglass and, by extension, the entire repair. Polyester resin, often used in boat repair, automotive and general-purpose projects, is commonly paired with fiberglass fabric. Epoxy resin, provides a more durable and waterproof alternative, typically used for high-stress areas or below the waterline on boats. Vinyl ester resin is between polyester resin and epoxy resin in durability and price. It is also often used for under the waterline and where corrosion resistance is needed.
Materials You'll Need
Gathering the correct materials is the first step towards a successful fiberglass repair. You'll need to stock up on the following:
- Protective Gear: Safety glasses, a respirator, and gloves to shield you from fumes and prevent skin contact with the resin. *It is imperative that a respirator is worn when sanding fiberglass to prevent lung damage.
- Grinder or Sander: A grinder with sanding wheel attachment is ideal for initial shaping, while finer grit sandpaper tackles the smooth finish. A grinder may be needed to remove the damaged area.
- Fiberglass Fabric and Resin: Acquire enough fabric to cover the damaged area with a small overlap, and sufficient resin to fully wet the fabric and surrounding repair area. A few layers of fiberglass will most likely be needed to build up thickness and strength.
- Mixing Supplies: Measuring cups, mixing sticks, and a way to measure the resin to ensure a proper hardening ratio - usually 1-2% by volume if using a polyester or vinyl ester resin. Check manufacturer instructions for mixing ratio on epoxy resin.
- Filler: For exterior repairs and to ensure a smooth finish, a filler suitable for use with fiberglass and resin may be needed. This could be fumed silica, glass bubbles, milled fibers or a premade fiberfiller or fairing putty can be used.
- Gelcoat, Pigments or Paint: (optional) Gelcoat is a colored polyester resin that can be used to color match the repair area. This is great if polyester resin was used for the repair. If epoxy resin is used for the repair, a specialized paint will need to be used in place of a gelcoat. Pigments can be mixed with polyester or epoxy resins up to 6% by volume to color match.
- Foam or Backing Material: For repairs where a hollow area needs to be replicated, a backing material may be necessary such as foam, layers of strong tape, plastic etc.
- Solvent: To clean tools and repair area.
Step-by-Step Repair Process
The repair process for a hole in fiberglass involves several key stages, each as important as the last.
Step 1: Preparing the Repair Site
Before you start, make sure the damaged area is clean and free of any contaminants. Use a solvent, such as acetone, to remove any grease, wax, oil, dust etc. The damage will need to be completely removed with a grinder or sander. Make sure to wear a respirator while grinding out the damage.
Next, you'll need to roughen the surface around the hole to provide a better bond for the new fiberglass with a grinder or sander. The goal is to create a rough surface with adequate adhesion for the new fiberglass patch without damaging the surrounding area. In most cases, you will need to create a smooth bevel or taper around the damaged area.
Step 2: Applying the Resin and Fabric
Cut several pieces of fiberglass slightly larger than the damaged area. A knit fabric, chopped strand mat, fiberglass cloth or a mixture of several of these are typically used. If it is a weight bearing area, a knit fabric should be used for strength. A backing material may be needed to prevent the fiberglass and resin from drooping into the hole. The backing can be some core material, layers of tape or plastic that will be removed after the repair. If using plastic, back it up with wood or cardboard to ensure the area is flat.
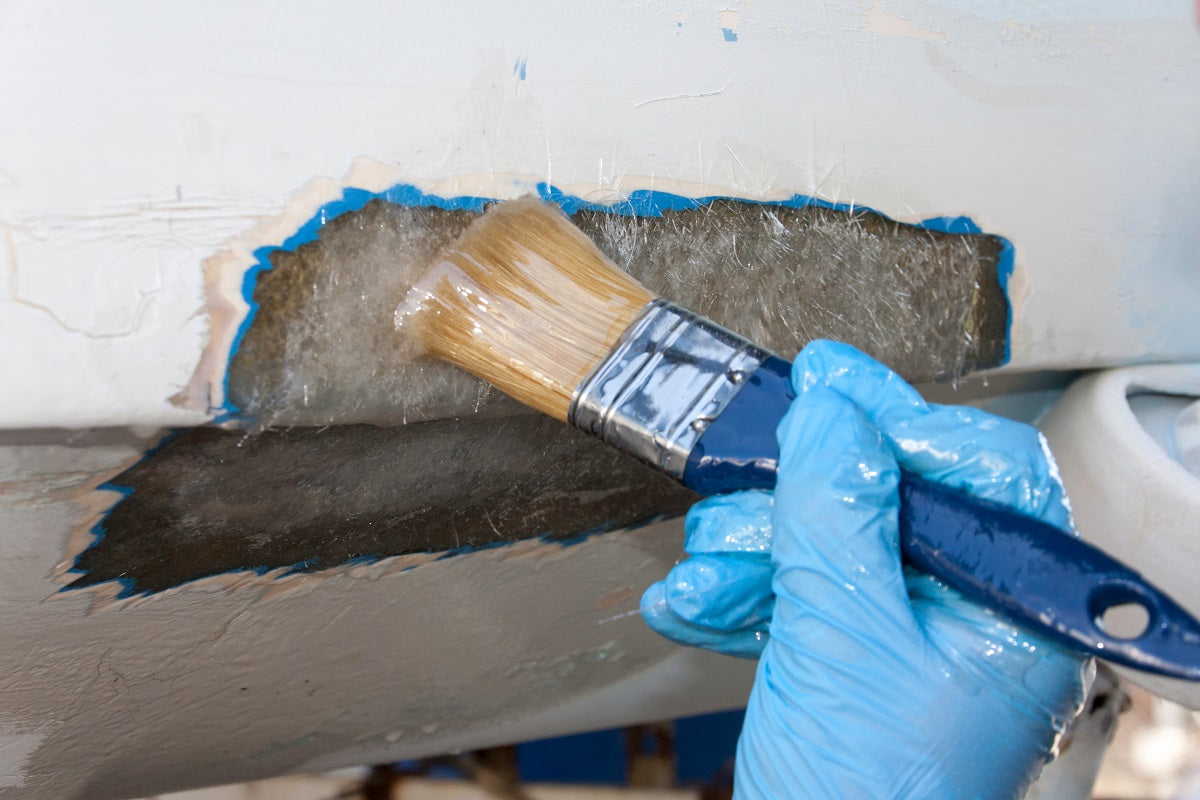
Mix an appropriate amount of resin according to the manufacturer's instructions, and thoroughly wet the repair area and the fabric using a brush or roller. Ensure the fabric is fully impregnated with the resin, but avoid using too much that the repair becomes overly heavy. The fiberglass can be wet out and then added to the wetted-out repair area, or it can be laid dry on the wetted-out repair area and resin then added. Press gently with a squeegee or roller to remove air bubbles and excess resin.
Step 3: Layering Multiple Coats (If Necessary)
In most cases, you will need to apply multiple layers of fiberglass, allowing each layer to partially cure before adding the next. You can use a roller to ensure a good distribution of the resin within the fabric.
Step 4: Shaping and Finishing
Once the repair has fully cured, use a grinder or sander to shape the new fiberglass to match the contours of the surrounding area. Be sure to wear protective gear and a respirator as you work. Transition from coarse sandpaper to finer grits to achieve a smooth finish.
Step 5: Filling and Smoothing
For a perfect finish, apply a coat of resin/filler over the entire repair area. This can be a resin mixed with a filler such as glass bubbles and fumed silica or it can be a premixed fairing putty. This will fill any remaining imperfections and prepare the surface for gelcoat/ paint/pigmented resin. Allow the filler to dry and sand it down until the repair is completely level with the original surface.
Step 6: Gelcoat/ Painting
Color-matched gelcoat, paint or pigmented resin can be applied to blend the repair with the rest of the vessel or vehicle. This is an optional step but one that most people take for cosmetic appearance. Make sure to follow the curing instructions for the product to prevent any post-repair issues. If doing this step, sand the repaired area and slightly outside the repair with a fine sandpaper before applying the color.
Top Tips for an Effective Repair
- Careful Mixing: Resin and hardener must be mixed in the correct ratios and consistently mixed. Uneven mixing can lead to patches of soft or brittle resin.
- Don't Be Overly Generous with Resin: Applying too much resin can result in a weaker, brittle repair.
- Take Your Time Sanding: The quality of your sanding directly impacts the final appearance of the repair. Be patient and work through progressively finer grits to achieve a smooth finish.
- Work in a Well-Ventilated Area: Fumes from the resins can be toxic, so working in an open or well-ventilated area is essential.
Common Pitfalls to Avoid
- Using the Wrong Type of Resin: Make sure to choose a resin that's appropriate for your application. It is best to figure out what resin was used for the original construction of the fiberglass laminate. Polyester resin and gelcoats do not adhere well to epoxy resin laminates. Epoxy resins will adhere to a polyester laminate though.
- Rushing the Curing Process: Follow the manufacturer's recommendations for curing times and temperatures. Rushing can weaken the repair. Working in too hot or cold of temperatures will also affect the final product.
- Skipping the Sanding: Proper preparation is key. Skipping the sanding step can result in poor adhesion of the new fiberglass to the old, and a weak repair.
- Failing to Properly Clean the Damaged Area: If the damaged area is not completely cleaned with a solvent and contaminants are still on the surface, there is the risk that the bond will fail.
Mastering the art of fiberglass repair can save you a significant amount of money and will give you a sense of pride in being able to maintain and restore your own possessions. It may be a bit intimidating at first, but with practice, you can achieve professional-grade results. Remember, preparation is just as vital as the repair itself. Take your time, be methodical, and before you know it, that gaping hole will be just a memory. Happy repairing!
**For best results: If the repair is structural, fiberglass both sides of the hole if you can access the backside. If not, do your best on the front side.
Disclaimer: These are basic guidelines for a fiberglass repair. Not all damage is the same. Some steps may need to change based on your particular damage and repair area.
Still have some questions? Don’t hesitate to give us a call at 833-669-7899 or email at sales@fiberglasswarehouse.com. We carry all the products you should need for a successful repair and our customer service team is ready to help if needed.
comments (2)
-

-
 Sherry
Will the boat leak if I just repair the hole and not gelcoat or paint? (I have a 50 yr old I just want to paddle around in – no motor)



@Sherry- You do not need to gel coat the repair. The gel coat does protect the underlying fiberglass, but it isn’t necessary.