0 item(s)
View cart
You have no items in your shopping cart.


A Few Tips and Tricks for Beginners Working with Tabletop/Art Epoxy Resin
Terri from WaterSong Creations put together a great video with some good tips she uses when working with epoxy resin. You can find the video above. If you want to read about it instead of watching the video, read below. These are things that have worked best for her. Experiment with what works best for you.
Hello Resin fans!
I thought today I would do a video for those who may be in the early stages of epoxy resin art or just getting started. What I am going to do today is go through equipment and things you want to have on your workstation handy. All within arm’s length. Also, I will go over things I like to use that are helpful to me and make my project go more smoothly.
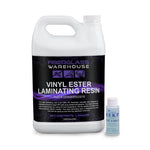
ProGlas 1000 Tabletop Epoxy Resin
Obviously, the first thing you are going to need when you are going to start an art project with epoxy resin is EPOXY RESIN. I am a fan and a proponent, shout it from the rooftops for ProGlas 1000 clear coat resin. I buy this in the 2-gallon kits because I am an artist. I am in 5 stores plus I do commission work so I do use a lot of resin. What that means is that I have tried a lot of resin and there are good resins out there but for my money, this is the best. It has a long work time. It dries rock hard. This is what initially drew it to me because I was doing trays and I found that trays were bendy and not curing completely. When they were cured, they still had some bend to them. I did research and this ProGlas 1000 was the number one choice for dries hard. That to me was very important at the time. I’ve come to love it for a whole lot of other reasons since then. I buy it through www.fiberglasswarehouse.com. I suggest you give it a try.
Water Bath for Resin
Now when I am getting ready to mix my resin, I put about 2 ounces of water in a mixing cup. Then I put whatever cup I’m pouring my Part A of the resin in, I set that in the water bath for a minute or two if I am mixing a large batch. I just sit one cup inside the other and let that Part A warm up for a couple minutes. Next, I put in Part B and I continue to let it sit in the warm water bath while I stir for few minutes. Then I take it out of the water bath and I scrape the sides really good and continue to stir.
Stir Time
My First Tip, whatever your epoxy resin instructions say for stir time, add 30 seconds to it just so you know you have everything stirred up. Scrape the sides and bottom frequently and thoroughly and here is why. When you stir your resin, you are getting everything mixed in the middle but everything on the sides and bottom are not mixed in. When you go to to pour everything out of the cup, you will go along the side to get every bit of resin because you never leave any resin in the cup. And if you haven’t previously scraped down the sides and bottom then you are grabbing resin that has not been thoroughly mixed and putting it in your project. Every time your project will have soft spots, it will be tacky or it won’t cure completely. So, make sure you scrape the sides often when mixing. Again, stir for the whole mix time that your resin recommends and then add 30 seconds to it.
Cups for Measuring, Stirring and Pouring
Now let’s talk about what we stir in. I like to use a 32-ounce cup for big projects. I also like to use pliable plastic containers. I have a smaller one for smaller projects. I like to go by ounces not millimeters so I always buy cups with ounces on them. If you use a cup that is pliable, set your cup aside for 24 hours after you use resin in it, then go back and give it a squeeze. All the dried resin that is left over, you can just lift it out of the cup. Then you have a clean cup to start with for the next time so you are not throwing away or recycling plastic unnecessarily. You can use these cups again and again and again. Or, you can get silicone cups. I have a number of them in different sizes. These are even better because at the end of the 24 hours, they do the same thing. Just mush them and lift the resin out. But if anything is stuck in there you can just turn it inside out and scrape it or wash it out. So those are great ways to mix.
When I pour the epoxy, I do like to use disposable cups in various sizes. I have them in 3-9 ounces. But when I want a controlled pour, meaning I’m going to be close to an edge or I want to be super specific on where I pour the resin, I will use the paper cups. I can squeeze them and make a very little opening and be very intentional on how and where I put the resin. So, the paper cups are good to have on hand as well.
Stirring the Resin
What are you going to stir with? I have various sizes of silicone stir sticks that are wonderful. I also use popsicle sticks. I like to use these for measuring out mica powder if I am doing very small amounts. Sometimes I will just mix up one or two ounces and these popsicle sticks are good for scraping out of small cups. Silicone scrapers are a little thicker. It is hard to get in the corners of the cup with a silicone stick but the popsicle stick can obviously get in there and get after it really well.
Project Preparation
When you are going to place your project, you never want it to lay flat on a surface. You always want to elevate it. So, I use little 2-ounce cups that I get at the Dollar Tree to place them under my project so it sits level and keeps it up off of whatever I’m pouring on. If I am pouring on a table, I am going to have either parchment paper or I like to buy plastic shower curtain liners from the Dollar Tree and place those on my surface. I buy the freezer paper 150 sq ft at a time and mostly use that because I produce such large quantities and I make such large batches at a time.
(Shows a baker’s rack in the background) This is a baker’s rack I bought with the trays. What I do is line them with the parchment paper and then put my projects on them and sit them up on the cups so it is up off the paper and when I am done, all of the drips are on the parchment paper. Also, when I am done I can either peel the epoxy resin off and reuse the parchment paper or just throw it away and start again. I work on the trays mostly but most people don’t have this so I recommend you get shower curtain liners or parchment paper to lay down and do your thing. The other thing you can do is get silicone mats if you are doing small projects. I have them all over my work station. They have dried resin all over them and every once in awhile I will go through and pick all that dried resin off and then we will be good to go.
Get your project up off whatever your work surface is so that once its cured, you don’t have it adhered to your surface. I use usually 1.5” to 2” wide tape to tape off the back of projects like wood boards. I find the wider tape is easier. I don’t have to use as many tiny pieces, I just use one big wide piece to cover my area. And once that is done, you just use your heat gun to heat up that resin just a bit and then pull that tape off and it comes off nice. You can just use a sanding block to smooth those edges. You want to have tape on hand for wood projects.
Level
I always keep a level on my workstation. I will lay it out on whatever I’m working on usually it is the wood boards I lay it on. If not, I will just put the level down on the surface that I’m working on to make sure its level. If its not, stir sticks or popsicle sticks are great to use as shims to even out. Because nothing is more frustrating than having a perfectly poured project and come back a couple hours later and see that it all slid off to one side. And resin walks, it is liquid and liquid always seeks its own level. If your project is not level, it will not be what it was when you poured it when you come back and check later.
Risers
I mentioned, I use little two-inch cups as risers. You can also get the actual artists’ risers if you have something that you need to lift up that has a smaller surface. I do a lot of wood cutouts- mermaids and octopus and such. If I use the small cups for these thinner pieces then it might adhere to the cup. So, artist risers with tiny points are good to have also. Most of this stuff I get on Amazon. Some of it I get at craft stores. Just do a little research and you will be good to go.
Paper Towels
Another thing I am never without on my workstation are paper towels. The single, select a size, paper towel folded in half. These are perfect to set my cup on when I am stirring because I am always going to have drips while I am measuring and stirring. Also, I can lay my stir sticks down on the paper towel. The paper towel catches everything and then I can just throw it away. Additionally, I will just grab another one and wipe off my stir sticks. I get the edges really good so it is reusable immediately for another project. I do it with the silicone and the popsicle sticks until I am ready for a new one. Another thing you don’t want to be without is toothpicks because invariably you are going to have dust land in your resin project. These toothpicks can go in and scoop it out and you are going to have resin on your toothpick. I just go over and twist the toothpick on the paper towel and then I am ready to go back to getting any other dust that has settled there.
Cleaning
Sooner or later, you are going to get resin on your hands. I never ever work with resin without gloves. I just said never ever but occasionally if I’m working with a piece of glass and I don’t want to risk getting any of the resin from my glove on the glass, I will take my glove off to move it. I keep a spray bottle of 91% isopropyl alcohol on my desk so I can spray it on my hands and clean the resin away. Soap and water will get a lot of resin off but there will be that tacky base that is left on your skin. 91% isopropyl alcohol is a great way to get that off. So, I have this spray bottle handy. It is great for clean ups and its also great for if you have a glass project. You can see all my windows over there where I do a lot of ocean scene windows and this is great for cleaning the windows before I get started. You always want to have this.
Getting Rid of Air Bubbles in Silicone Mold
The next thing I have is a small mister. When I am working with a mold, I don’t like to use a heat gun or a torch in the mold. This is because it can make the resin stick to the mold so that when you are pulling it out, you are pulling pieces of the mold out with the project. I have thrown out more than one of these molds for that reason. So, I learned if I just give this mold a quick spritz of the isopropyl alcohol, it will pop the bubbles and it does nothing to harm the mold. This mister I always keep close. And I always have a little syringe that I put in the alcohol and put it into the mister and we are good to go. Quick and easy no muss no fuss. So those are some good tips for that.
Safety
Never work without the gloves. Never work without the respirator. I change the filters according to the manufacturer directions. I usually do it sooner because I use so much resin when I work that I want to be sure I keep safe. I always have a fan on as well. I live in Florida, so extreme heat is my enemy and humidity is also my enemy. There are very few times during the year where I can actually throw the windows open because the optimum temperature for working with resin is 70-75 degrees and of course low humidity. Neither of which happen where I live very often. But I do keep a fan on. After the project is poured and is starting to cure, I use the baker’s rack which has a cover for it. I close the cover down and my project is protected from dust. I don’t mind opening the windows once the things are on the tray and the zipper is down to keep some of that humidity. Then I will open the windows with the fan on to get some of the resin smell out.
Protecting from Dust
When you are laying out your project you want to have a box, a plastic tub or some kind of container. I have seen some people take PVC pipe and measure out what their project is if it’s a large project and tape heavy plastic around it. Just something to cover your project with once its complete so that dust doesn’t settle on it because whatever degree of wonderful housekeeper you are dust will still settle.
Clothing
Hairdresser smocks that snap up the front are handy. I have a lot of old clothes that I wear when I pour the epoxy resin. Maybe you are as neat as can be and never get anything on your clothes so this is not a concern for you. I know resin is going to get on my clothes so I roll my sleeves up and I wear the smock often. Keep old clothes on hand in case you have an accident. You may want to put down a shower curtain liner on the floor in case something spills on the floor.
Heat Gun or Heat Torch
When you are working with a mold use the isopropyl alcohol to pop the bubbles. You are always going to have bubbles. If you stir slowly and don’t whip or beat the resin when mixing it you will cut down on the number of bubbles. But regardless you are going to have bubbles. Heating that epoxy resin first, also cuts down on them. In order to pop those bubbles, you can use a torch or you can use a heat gun. A heat gun will move the resin so if you got it where you want it in a particular way, the heat gun isn’t as effective as the torch. The torch you never want to leave it sitting on the resin for very long. You want to keep it moving constantly. You can go back to the same spot again and again but you want to keep it moving. Don’t let it sit in one spot. Circle all around that spot and then you can come back to the spot several times to pop the bubbles. Never leave it in one spot because you will set it on fire or you will scorch it. You will start to see smoke and you know to get that torch away. These heat torches are readily available everywhere. The butane is also readily available everywhere so a torch is always handy to have. When I am working with wood pieces or working with glass or any kind of solid non silicone, I always use the torch because it really gets after the bubbles and doesn’t move around my resin when I get the look I want. That is a great tip.
Additives
When you are using mica powder, you don’t have to be as concerned about the proportion. If you are using acrylic paint especially the dollar store paints or the Walmart paints, they are a high percentage of water. Water and resin do not mix. So, you want to be careful to limit the amount you use. Alcohol inks are no problem. Mica powder isn’t as much of a problem. Be careful with the paints that you don’t get too much water making the balance out of whack. You can put all the glitter you want in resin and it is not going to affect your ratio. That is fine.
Have fun with additives. Play with them to give your project interest. I use pebbles, seashells, sea shell chips, glitter, acrylic diamonds and geodes. All of those give your project interest. I also use little film cutouts of sea life. If you have a Cricut machine you can cut out shapes. Those are fun to add into your project.
Adding a Second Layer of Resin and Food Safety
If you want to pour a second layer, you can wait about 5 hours generally and then pour a second layer (Just make sure the first layer of epoxy is set up first). I pour a tremendous amount of charcuterie boards. I go back over them with a top coat of clear resin which will meet the industry standard for food safety. I will give the first layer about 5 hours to set and then I will go back and add a clear coat over it as long as it has no additives, you are good to go. Use food safe clear coat over anything you will use with food including serving trays, charcuterie boards and wood boards.
I hope this was helpful.
If you have any questions, don't hesitate to reach out to us. You can comment on this post, email us at sales@fiberglasswarehouse.com or give us a call at 1-833-669-7899.