You have no items in your shopping cart.
Welcome to the anticipated Part 2 of our fiberglass mold making series! In this post, we continue our dive into the intricate world of fiberglass mold making, taking you through every step from the application of fiberglass and resin, through the crucial stage of removing the plug, and finally, to the process of preparing the newly created mold for its first use.
Fiberglassing
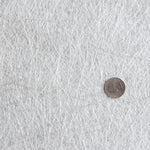
A layer of 1 oz chopped strand mat should be used as the first layer. General purpose polyester (laminating) resin or ISO Resin is commonly used as the resin. The ISO resin is a tooling resin which shrinks less than the general purpose resin. This may not be a factor for most parts, but large molds or final parts with critical dimensions should use the ISO resin. The resin should be mixed with MEKP (at a 1% to 2% ratio ).
Wet the mat out with a brush or spreader. Work the resin in with a bristle roller. Afterwards, use an aluminum roller to force out all the air. When you are done, there should be no white fibers or air pockets visible.
Allow the resin to cure. When the resin is hard, but still tacky, it is time to put the next layer on. Never cure multiple layers at one time because this may cause warping, especially in large molds. Add additional layers of mat and/or cloth to give the mold strength. An additional 3 layers of 1.5 oz mat is usually sufficient, depending on the application. Be sure to allow adequate curing time between layers.
Removing the Plug
Allow 2 or 3 days for the mold to cure completely. Use a plastic wedge or sharpened paint stirrer (never use hard or metal tools) to slide between the mold and plug. If there is excess resin or fiberglass hanging over the edge of the plug, the plug will not be able to slide out. The excess will need to be cut off. Separate the entire edge of the mold from the plug. You should now be able to remove the plug from the mold.
Mold Preparation
It is time now to prepare the mold for use. Most times, the mold will need to be sanded and polished. Sand the mold by using 220 grit and progressing to 600 grit. Afterwards use a polishing agent such as, Aqua Blue 100 and 200 to polish the mold. You will also want to use a sealer to seal the mold ( we sell Orca Seal Mold Sealer).
Wax and buff with Partall #2 and coat with Partall #10. For the first 5 parts off the mold, use Partall #2 and Partall #10 again. This should fully season the mold. Apply Partall #2 after each part going forward.
See our Ultimate Mold Making Guide for more info. Still have questions, email us at sales@fiberglasswarehouse.com or call 833-669-7899.
*** The information provided is a general guideline. Each project is different. Any information used will be done at the user’s risk. Fiberglass Warehouse can in no
comments (2)
-

-
 Greg Antoni
Hi, I have made 3 molds at the same time. Two of them are perfect but one has cavities in it. I am guessing that the PVA was not entirely dry or the gelcoat was not cured enough and I rimpeld it when applying the chopped strand mat or my ISO resin/MEKP ratio was not correct.
I wonder if you have experience what could have caused this. My other question is, if I can repair this by adding a few drops of gelcoat or resin and push the plug in it again.



@Greg- I’m guessing the gel coat was too thin. Too thin makes it too weak and when you add the fiberglass and resin, it pulls and distorts it. It is called alligatoring. As far as fixing it, that is a tough one. You could try putting gel coat in the bad spots, then pressing the plug back in. I doubt it will be perfect, but it may be good enough to sand it perfect afterwards. Other than that, you can add gel coat to the spots and sand.