You have no items in your shopping cart.
2lb Polyurethane Pour Foam Instructions
2 lb. urethane pour foam is a two-part liquid that is great for flotation and insulation as well as filling voids and gaps. It is often used under boat decks. It creates a closed cell structure that resists water absorption.
Needed supplies and tools:
- Stir sticks or drill head (preferred)
- Drop Cloths/ Ground Cover
- Acetone or lacquer thinner

-Work in a well-ventilated area.
-Wear the proper safety clothing such as eye protection and gloves. Pour foam will not come off clothing. Wear clothing and shoes that you do not mind ruining.
-Prep the area you will be working on. Clean away any contaminants before starting the mixing process. Cover areas where foam may spill with drop cloths.
-It is important that you make sure the surface you are pouring out/in can handle temps of up to 130 degrees Fahrenheit.
-Make sure both the pour foam, the surface you will be working on and the temperature in the room are warmed up to 75-80 degrees before mixing and applying the foam. If it is too cold, the foam will not grow to full capacity and will shrink once it has risen. If it is too hot, the foam may rise too quickly.
-Calculate how much foam you will need.
-2 pint kit = 1 cubic foot, 2 quart kit= 2 cubic feet, 2 gallon kit= 8 cubic feet, 10 gallon kit= 40 cubic feet
-Plan to work in small batches as the foam will expand quite a bit. The foam exerts some pressure as it expands. Be prepared with proper venting if you are working with a closed cavity or mold. Overflow vents should be made by drilling some holes in the area before mixing the foam.
-The pour foam is sticky. Have cleaning supplies such as acetone and lacquer thinner ready for when you are done pouring. You will want to clean up the foam when it is still liquid. Once it is fully cured it is extremely difficult to clean up. 
1. Once the foam, surface you are working on, and the room are at 75-80 degrees, mix the foam at a 1:1 ratio by volume. Make sure you measure accurately.
2. Mix well for 25 seconds. You can use a drill head or stir stick. If the temperature is well above 75-80 degrees, the mixing time will be shorter.
3. Be ready to pour immediately after mixing
4. Pour foam where needed. The foam will start expanding in 10-20 seconds. It will continue expanding for 4-5 minutes at 75-80 degree temps. When the foam is fully cured, another layer of foam can be added or polyester and epoxy resin can be used to laminate over top.
When working with multiple pours, wait approx.15-20 minutes before pouring the subsequent batch.
****We recommend doing a small test before delving into your entire project. Work in smaller batches until you are familiar with pour foam.
Want to see the polyurethane boat pour foam in action? Check out the video, HERE.


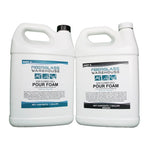

- Buy this, not the cans of spray foam. The pour foam can be easily shaped and is more durable.
- A Florida tip – chill part B before use. It will increase your use time.
- The liquid components are ruined by moisture! If you can, purge the air in the can with nitrogen. If you can’t, close it tight, seal it well and don’t buy too much at a time. The large can is a false economy if you never get to use the bottom half of the container…