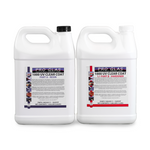
Proglas 1000 is an extremely clear, tough, high gloss UV epoxy coating. It is formulated to produce a deep glass like appearance in a single layer on a sealed surface. Proglas 1000 is typically used in table top applications. Two or more layers are often applied for added depth and protection. Proglas 1000 has been formulated for improved UV resistance to reduce yellowing and surface degradation from UV exposure. It has an extended “open time” which allows up to 50 minutes in the mixing container at 70º F and up to one hour working time on the surface being coated. Not recommended in freezing climates due to possibility of de-lamination.
Preparation: Bring Epoxy Resin Part A and B up to room temperature. Ideal working temperature is between 75 and 80 degrees. If the resin has been kept in a cold temperature, it may have crystallized. Warm the jugs of resin in a warm water bath. Make sure the surface is free of dust, oil, etc.
Needed supplies and tools:
- Pour equal parts by volume of the Part A and Part B into the graduated cups. (If the resin comes out more like molasses than syrup, the resin is too cold.)
- Mix the resin with a stir stick (tongue depressor, spatula, or paint stir stick). Stir steadily, scraping the sides and bottom. The resin will appear hazy but will clear up after 3 or 4 minutes.
- Apply the Seal Coat (not necessary for some surfaces): Pour some resin on the surface and spread it around with a foam brush or squeegee until a thin layer covers the whole surface. Allow the resin to cure for 4 hours before the flood coat is added. The seal coat will prevent most bubbles from forming during the flood stage.
- Apply the Flood Coat: Pour the mixed resin down the length of the surface. The resin will self-level and tools are not required. Allow the resin to run down the sides. Any drips that form along the bottom edge can be removed after the resin has cured. Each flood coat will be approximately 1/8” thick. If additional thickness or layers are needed, allow the previous layer to set up before adding more (typically 4-6 hours).
- Eliminating Air Bubbles: Once the flood coat has settled into place, take a torch or heat gun and wave the tool 6 to 8 inches above the surface. The bubbles will instantly start to pop. Repeat the process until all bubbles are gone.
- Keep the room between 75 to 80 degrees during the curing process. It will take about half a day for the resin to become tack free, but full cure isn’t complete for another 3 days. If the temperature falls below 75 degrees, the cure time will lengthen. If too cold, the resin may never fully harden.

- Sticky Spots in Cured Resin – Resin and hardener were not mixed thoroughly, or mixed at the proper ratio. Proglas 1000 is a 1:1 ratio by volume
- Mixed resin cures too quickly – Resin was mixed too long or aggressively. Or, a large quantity of mixed resin was left in a cup for an extended period of time before pouring. Epoxy resin generates heat as the chemical reaction takes place. It is important to mix thoroughly and pour the resin out quickly.
- Air bubble not rising to the surface – The resin was too cold when mixed. The resin thickens as it gets colder. Mixing cold resin will create many little bubbles. Once poured, the bubbles can’t escape, even with a torch to pop them. Ideal mixing temperate of the resin is 75 to 80 deg.
- Crystallized resin – Gritty, chunky or clumpy resin. This occurs when resin gets close to freezing. Heat the jugs of resin and hardener in a warm water bath of 120 deg F, agitating the resin occasionally, until the crystals have disappeared.